Here it is folks... my first post-architecture-school project:

...creating a home for myself out of Jack Larimore's 1971 Airstream trailer. Follow along as it comes to life.

(click on images to see em larger)

(and don't forget to check the PAGES)

Friday, December 2, 2011

THINGS in a THING in a THING

Alright, here's one that's been a long time coming....

DESIGN SCHEME #1 
The first legitimate proposal for the Airstream's overall layout. 

  I presented this to Jack and Helen months ago, but I have just gotten around to finalizing the drawings and renderings. You know how it is. The scheme was well received, but since then things have changed - as things tend to do. There are now different required accommodations and a different scope of what I can spend time building. So it goes. But I figured I'd share it with you.

Here's how the big picture parti breaks down:
(as seen in lengthwise & horizontal cross section)


So you have an Airstream
Its a thing. 
Its a shell-sort-of-a-thing. 


Inside this thing you place another thing. 
The new thing is a more solid-type thing. 


You carve out some anti-things in the new thing. 
People can hang out there.


We'll define the solid-ish-ness of the new thing. 
Its actually a latticework. 
You can put other little things in it.
How about that.


Here's how the thing-in-a-thing scheme 
shakes out in the real-world-Airstream:


  There were many layouts that almost worked, but one of any number of immovable objects or conditions (wheel wells, low angled ceilings, heater) and other large movable objects (refrigerator, bed, helen's sweet victorian armchair...) would inevitably cause trouble. In this scheme, the heater is under one of the diner benches and the old refrigerator is switched out for a minifridge and located in the base of the 'storage' unit.


Here was a way the diner booth 
could transform into a guest bedroom:


  As it stands now, the Airstream's layout will likely be quite similar to what it was previously. The architect in me would love to rethink it, but there simply aren't that many options that fit all the basic necessities. And I'll admit, those Airstream engineers figured out some pretty functional floor plans. This blog will be my outlet for Airstream designs that accommodate few of the necessities, but many of the luxuries.  In the mean time, the creativity will come in the style and materials in which a past layout is realized. 

Monday, November 28, 2011

BIG MOVES and the DITCH WITCH


   The farm was in need of a few outdoor water lines, 
which meant it was also in need of a few long trenches, 
so Jack rented a Ditch Witch.


For those of you unfamiliar with the Ditch Witch...
de-unfamiliarize yourself! These things are sweet. 


   The Ditch Witch is an earth moving chain saw. You lower the blade into the ground and put the wheels in reverse - backing up towards your intended destination. Normally, you lay pipe at the bottom of the resulting trench and fill it back in.


Jack describes this process as "The unholy union 
between the ecstatic skin of the earth...
... and shitty plastic."


   However, since we would eventually need a large hole under the back of the airstream (filled with gravel and used as the grey water drain) Jack thought we might as well address this spot while we had the Ditch Witch. You can't exactly make a clean hole, but you sure can loosen up the dirt - which will make it much easier to remove later.

First step - move the Airstream. Big moves in Bridgeton. 


Next step - witch a ditch


   This thing was a bit difficult to control at first.
Imagine trying to dig a trench with a pig on a leash.
It digs. There's no question about that. 
But its herkin' and jerkin' all over the place 
and it only vaguely listens to where you want it to go. 


I found myself asking:


"Which ditch would a Ditch Witch stitch 
if a Ditch Witch switched its niche?"

   I can't answer that, but I can answer this:
What makes boys happier than all hell? 
moving a pile of dirt from one place to another. 
I had a good ol' time.

The Ditch Witch also had this great warning sign


The first part applies to some of the best situations:
"I don't know what's about to go down, 
but that shit's gonna be crazy."


Wednesday, October 19, 2011

PSYCHEDELIC CHIC-ERY

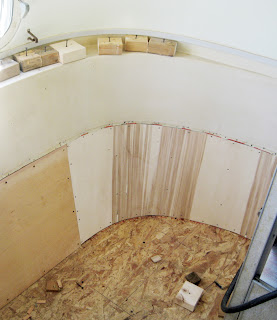
Another big change - laying down the new floor.

Its gonna be burnt plywood and its gonna be sweet.  

Why burnt plywood? 
Well, just take a look at the formula:

Ultra cheap material + Propane torch + Polyurethane
= Charred psychedelic chic-ery

Yes sir. Thats how we do in Bridgeton

First step - fit strips of plywood to the airstream


Next step: Remove & Torch


How did it go? 
I'll leave you with a cliffhanger....


FLOATING FIBERGLASS & SCRUBBIN' the 'STREAM

  With the shower pan and barrel wall in place it was time to address a variety of unresolved issues in the bathroom. The first step was to fill the voids left by all the demolition. This meant securing and connecting the floating fiberglass edges to the walls and floor. Here is an example:


  With no flat walls to work from and the not-so-friendly nature of fiberglass, I was getting bogged down. Jack had the idea to put the bathroom on hold and make some big changes in the rest of the Airstream. I was on board.


One major step towards livability: 
Remove the mold that now coated the walls. 


  Having sat through a handful of insane rain storms, mold was gettin' down and dirty in the Airstream. So we had to bust out the big guns: buckets full of TSP, hot water and bleach and three days of scrubbing. 


Ok, it wasn't quite that bad.
It was more like this:


Now the place is sparklin' clean. 

I also removed wasp and bird nests from the vents.
Sorry fellers... try the chicken coop next time.


SETTING DEBRIS FREE


What's this image? A gestural, abstract expression 
commenting on the nature of form?

...Its a piece of fiberglass I ripped out of the bathroom...


... a piece of fiberglass that said "Check me out. 
Im a cool lookin' form."

I threw the rest of the debris in the air. 


A STEW for YOU & BARREL of MONKEYS

Ok. 


Its been 3 months since I posted anything. You know how it goes. Sometimes life puts the ol' Airstream blog on the back burner. The Airstream itself, however, has definitely NOT been on the back burner. Its on the front burner, baby. Well maybe not the front burner. Its been slow cookin' and now things are getting niiiiiiice and juicy. So let me share with you this tasty Airstream stew.


First off, the rusty barrel shower wall has been finally finished. Check it out.


Don't worry - it didn't take the entirety of the past 3 months. But making the wooden trim pieces to cap off the barrel pieces was quite a job. It was fairly straight forward in theory:


But the nuances of its construction ended up being more complex than a barrel of monkeys.


The final stage was nearly a disaster. I was in the middle of glueing the two finished halves together when I realized the barrel shape prevented me from using any clamps in the shop. Oh shit. Glue's setting. I tried some jerry-rigged solution that failed miserably. Oh shit. Glue's setting.


Then I remembered I had seen a stack of old wooden clamps in a barn on the property - they could work. Like a crazed, sweaty wild animal, I ran out of the studio, through the garden and to the barn. Jack saw me and must have wondered where I was running on such a hot morning. The clamps worked. Nice.


With that relief, I transformed back from a wild sweaty animal into subdued sweaty human.

Here's the final product.


(click to see larger)


It is with absolute accuracy and seriousness that I say my bathroom barrel's got a bunghole.


I'll leave it at that.


Wednesday, July 13, 2011

POKE SALAD ANNIE

   This is in no way noteworthy news, but I did just use a machete and a weed wacker to clear out the 6 foot tall poke weed that had all but engulfed the Airstream...


THE OL' UNDER & UP

How to install the shower pan...


   We figured it would simply take four guys and a lot of expletives to manhandle the shower pan into place. But that bathroom doorway is barely wide enough for one person, much less four guys hoisting an awkward 300 lb object. It was certainly possible... but certainly would be unpleasant.


   Jack had the idea to pull "the ol' under and up".... or at least thats what I've been calling it. Now, I'm not talkin' about whistle pig tunneling tactics here, I'm talkin' about the ol' under and up where you lift a concrete shower pan with the forks of a tractor and sneak that sucker under the rear of an Airstream and up through a hole in the floor into place. 


   With a little forward and back, up and down, and nudging with a 2x4, the shower pan found its final resting place. We threw some safety jacks underneath and went crawling around to reinstall the C channel supports.


Sunday, July 10, 2011

RESEMBLIN' REASSEMBLIN' CROSS-MEMBERIN'


Thought I was done under the rear of the Airstream?
You thought wrong.

There was still more cutting to do 
to make room for the shower pan.

...awkward, disorienting cutting


Balancing on the threshold of enclosure

... Or sittin' in a hole

Call it what you will. 
Either way, it was dirty.


   We replaced two cross members that supported the floor with new members that rest on the bottom flange of chassis's primary C channels. This would allow the shower pan to sit 5 inches below floor level. The project started off heavy (replacing a fiberglass tub with concrete shower pan...), so in the spirit of things, the new members were made far beefier than previous ones.


GETTIN' A HOSE-DOWN


The shower pan passes the shower test

... i suppose 

Tuesday, June 21, 2011

Saga of the 300 lb Shower Pan


Alright…

  For all those folks who thought nothing has been happening on the airstream for the last month, let me tell you a story... “the Saga of the 300 lb Shower Pan”

  As you may recall, Jack and I had plans to cast a concrete shower pan. From a practical standpoint, a concrete cast was a good way to create a customized shower pan for a small, oddly-shaped space. From an aesthetic standpoint, this was a great way to start off the Airstream project – respond to one thoughtfully rounded object with another. Plus, Jack had plenty of experience casting concrete objects at this scale and I was eager to learn the intricacies of the casting process.

  Once that rusty oil drum came along (see previous post) the shape of this shower pan fell into place


  Casting the shower pan itself went along quite smoothly. The saga was in the mold - specifically the piece that would create the central void in which a person would stand.

  The mold starts with a rough form, then a variety of materials (plaster, filler putty, primer, paint, etc) are added, sanded, added, sanded, added, and sanded  until the form is accurate and concrete-resistant. This process already lends itself to being a time-consuming experience, and knowing how much to add and how much to sand at each particular stage makes the difference between “time-consuming” and “saga.” I have never made a mold like this, so you know where this story is headed...


   The saga-creating problems came primarily in adding too little material and sanding too much in the plaster/joint compound stages. This wasted time and left a plaster surface so thin that it became very unstable. Every time the form came close to being finished, a huge chunk of the surface would flake off and the add/sand/add/sand process would continue. e

  As if this wasn’t enough, I realized halfway through that I had not mirrored the form when making the mold. This meant the final shower pan would come out mirrored from the original design. Oh, mold...


  Fortunately, the mirrored shower pan still worked. It simply fit differently. I had grown quite fond of the form un-mirrored though...

  There are plenty more gory details regarding the mold, however, eventually it was pronounced "pretty damn good" or at least "good enough to cast." So we cast it. 


Despite the saga, the final product came out quite nicely.